Growing Tomatoes
Let’s face it; there is nothing better than offering your guests a garden salad with home-grown tomatoes. Even if you have limited garden space or live in an apartment, planting tomatoes in a container or bucket is extremely easy. A container can offer your tomato plant the same environment required for planting inground. Keeping in mind the differences between planting in a container and planting inground, as well as a few tweaks and tricks, you can harvest tomatoes regardless of the size of your garden.
Before we go into more details about watering, diseases and fertilizing, you, first and foremost, need to plant the tomato seedlings. Remove the bottom leaves and plant your tomato seedlings as deep as possible. Tomatoes are one of the few plants to which this advice applies because of the fine silver “hairs” growing from the plant’s main stem. Those buried beneath the soil will develop into roots, providing a more extensive rooting system that ensures a stronger and healthier plant. Plant smaller seedlings into trenches and fill them with the ground as the plant grows.
The bucket list for planting into a container:
- The space is limited for the roots to grow in containers, so use at least a 20-litre bucket.
- If you use a plastic bucket, make sure that you use one safe for planting and, if possible, use a recycled bucket.
- Do not use terracotta pots for planting tomatoes; it is very porous and dries out way too quickly for tomatoes.
- Make sure that there are enough drainage holes at the bottom.
Add Aquafix to your gardening product must-haves to ensure consistent moisture levels. When planting your tomatoes, mix the recommended amount of Aquafix into the well-draining ground or potting soil. Aquafix can store water and nutrients up to 300 times its weight between waterings, ensuring that it is readily available for uptake by the plant’s root zone – saving you a lot of water!
Remember that containers and pots dry out quicker, especially when placed in full sun, which makes the addition of Aquafix even more essential for moisture control and preventing nutrients from leaching out at the bottom of the container. 6-8 hours of sun is ideal, but on scorching days, you might want to consider covering them with a shade cloth. The addition of mulch around your plants will also help to keep moisture in.
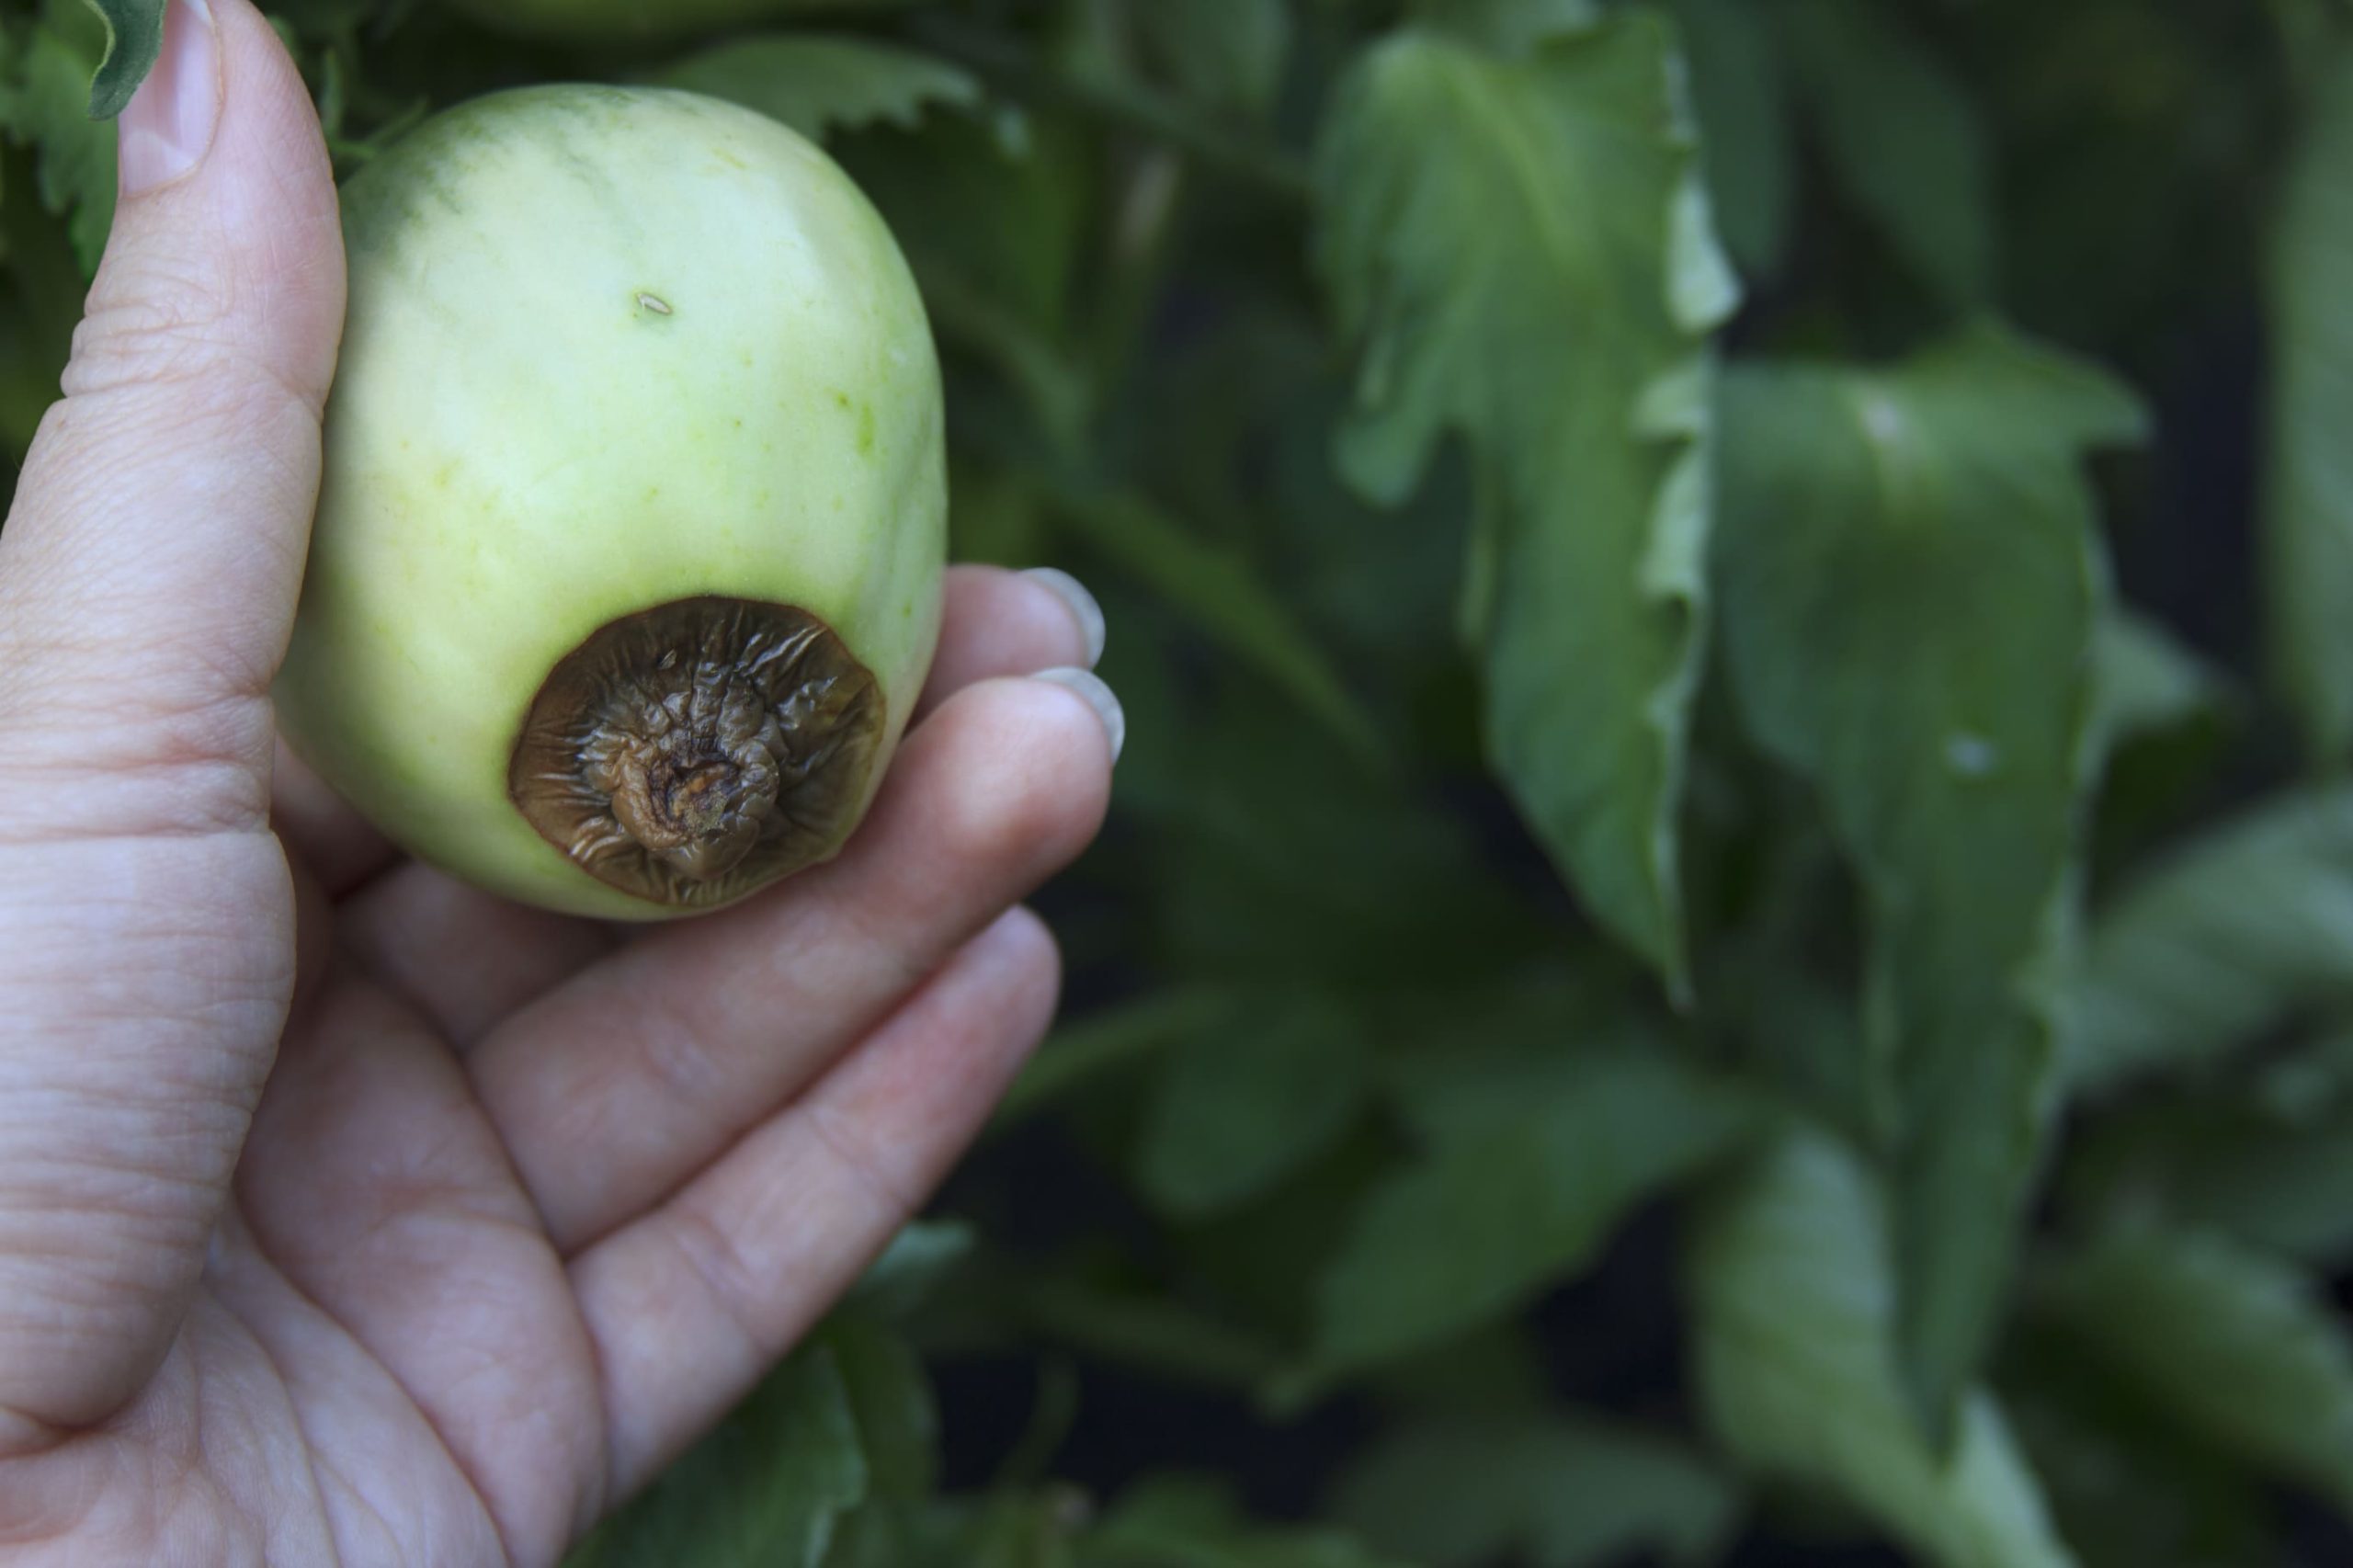
Tomatoes need two essential nutrients, calcium and magnesium. If you are planting in a pot, you need to supplement these nutrients naturally available in die ground, especially if you want to avoid blossom-end rot caused by a lack of calcium in the plant. Luckily the solution is easy. A handful of dried, crushed eggshells mixed into the potting soil is an excellent source of calcium for your plants. Side note: If you planted inground and your tomatoes get blossom-end rot, it is probably due to poor watering. The magnesium requirement is for good fruiting. Add 1 tbsp of Magnesium Sulfate under the root zone when planting your tomatoes.
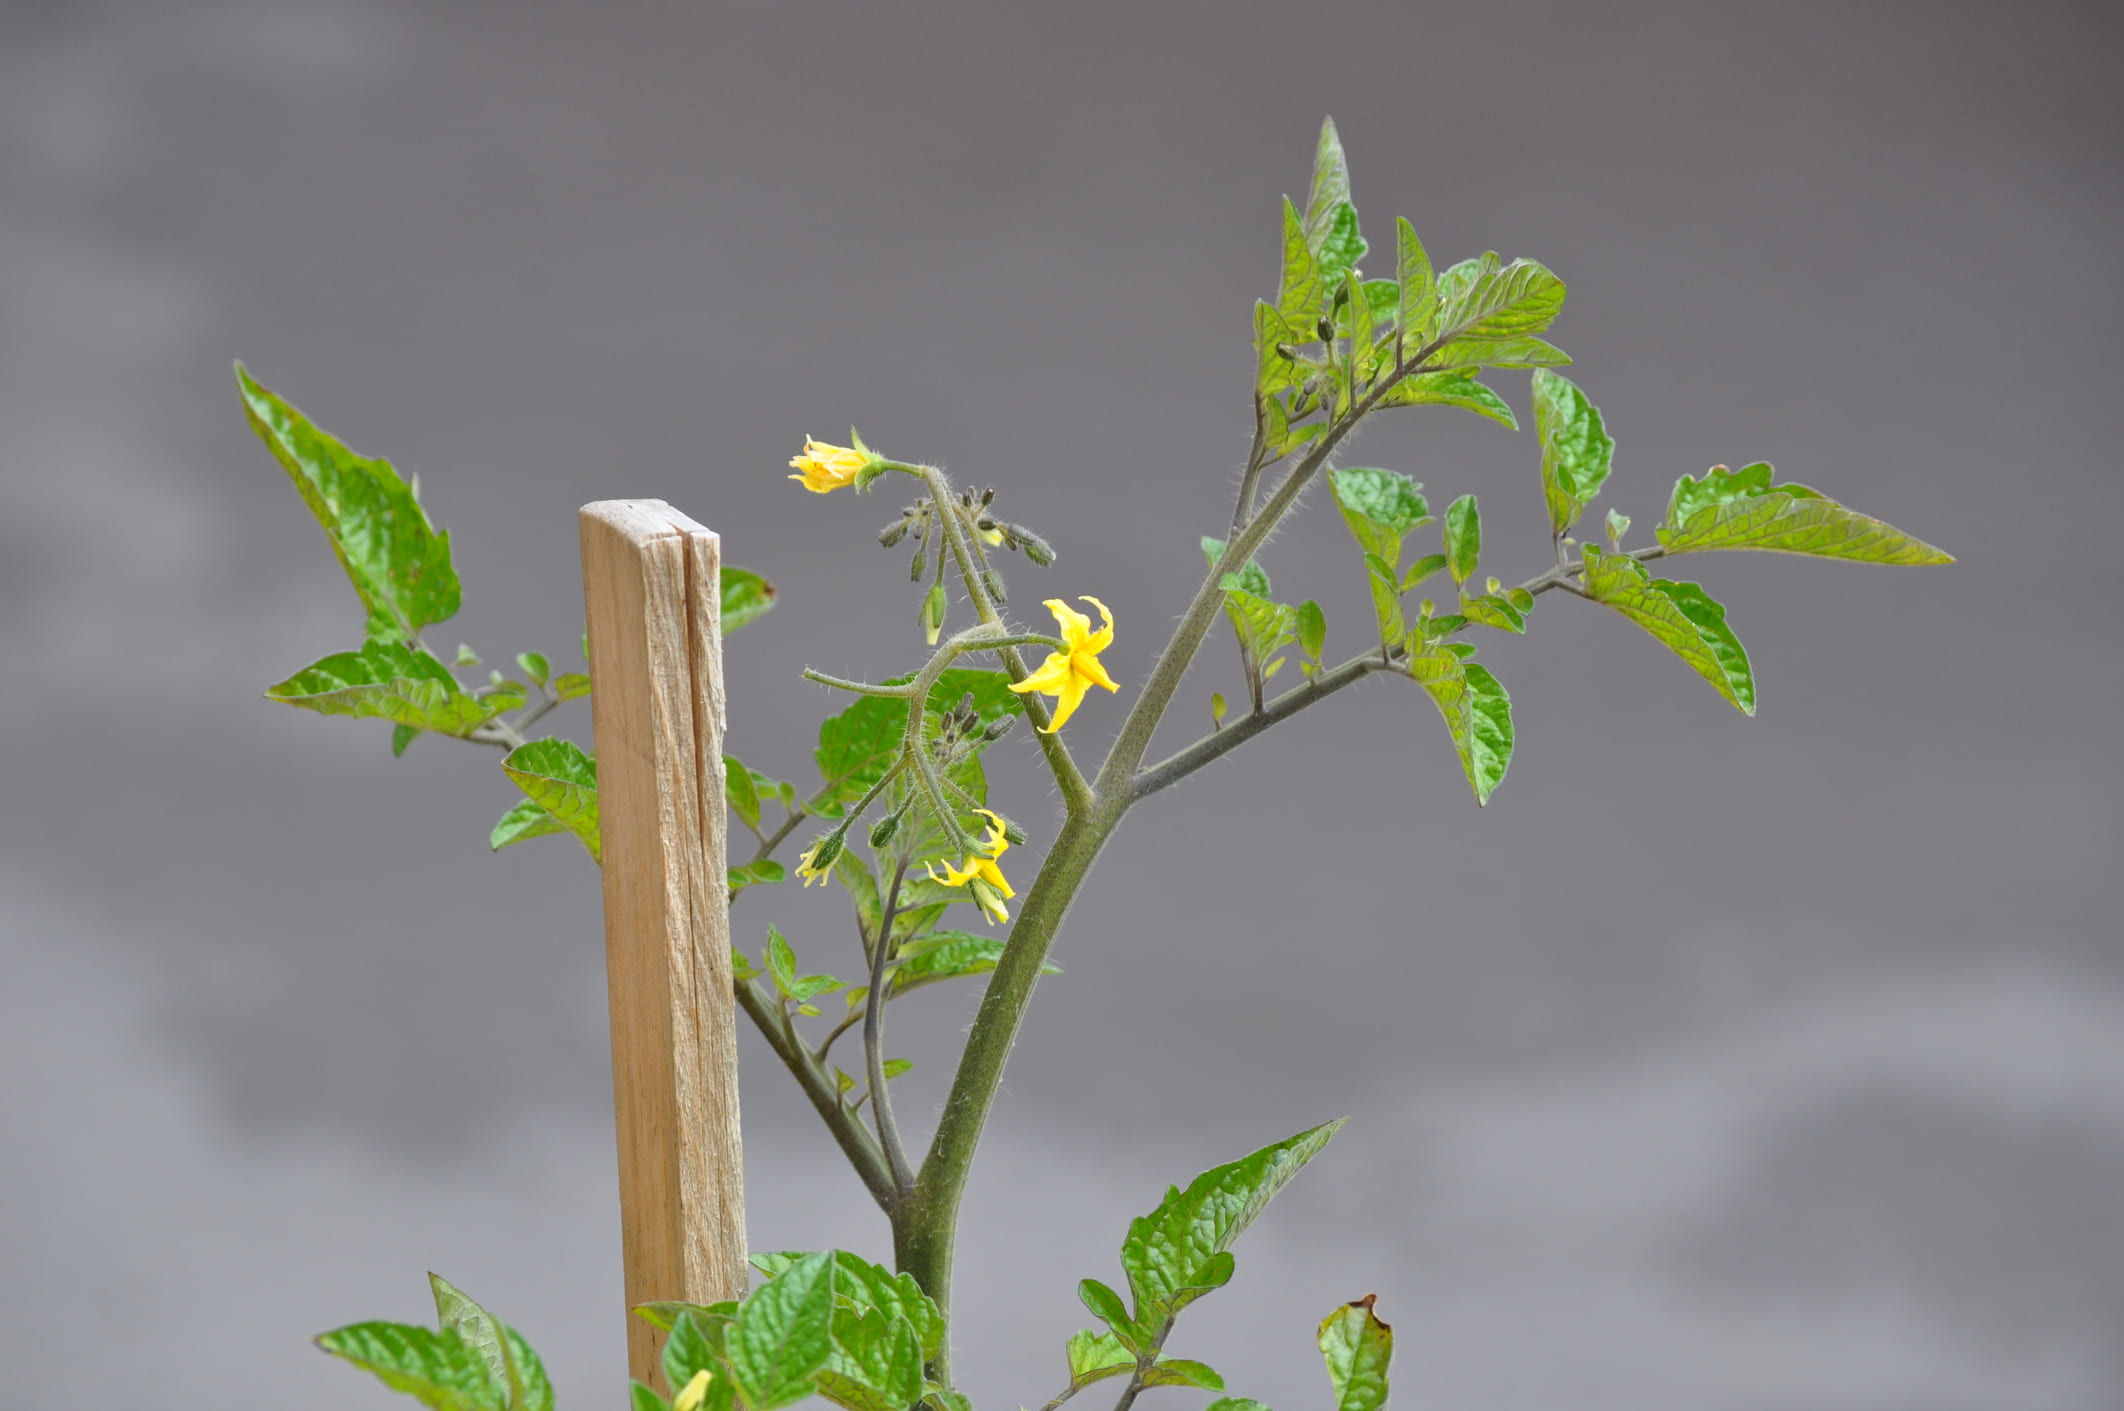
Support your tomato plants, especially if your space is limited, so your plant can grow upwards. You can use store-bought tomato cages, build your own with fence mesh, use a stick or pole, or use the rope technique, but for that, you will need a structure to tie the ropes. When tieing the main stem to a stick or pole, it is vital to remember to allow enough room for growth.
Staking the tomatoes plants will also help avoid getting the leaves wet while watering. Tomatoes like constant, evenly moist soil, but tomato leaves are fragile when it comes to pests and diseases, and water that sits on the leaves creates a breeding ground for diseases.
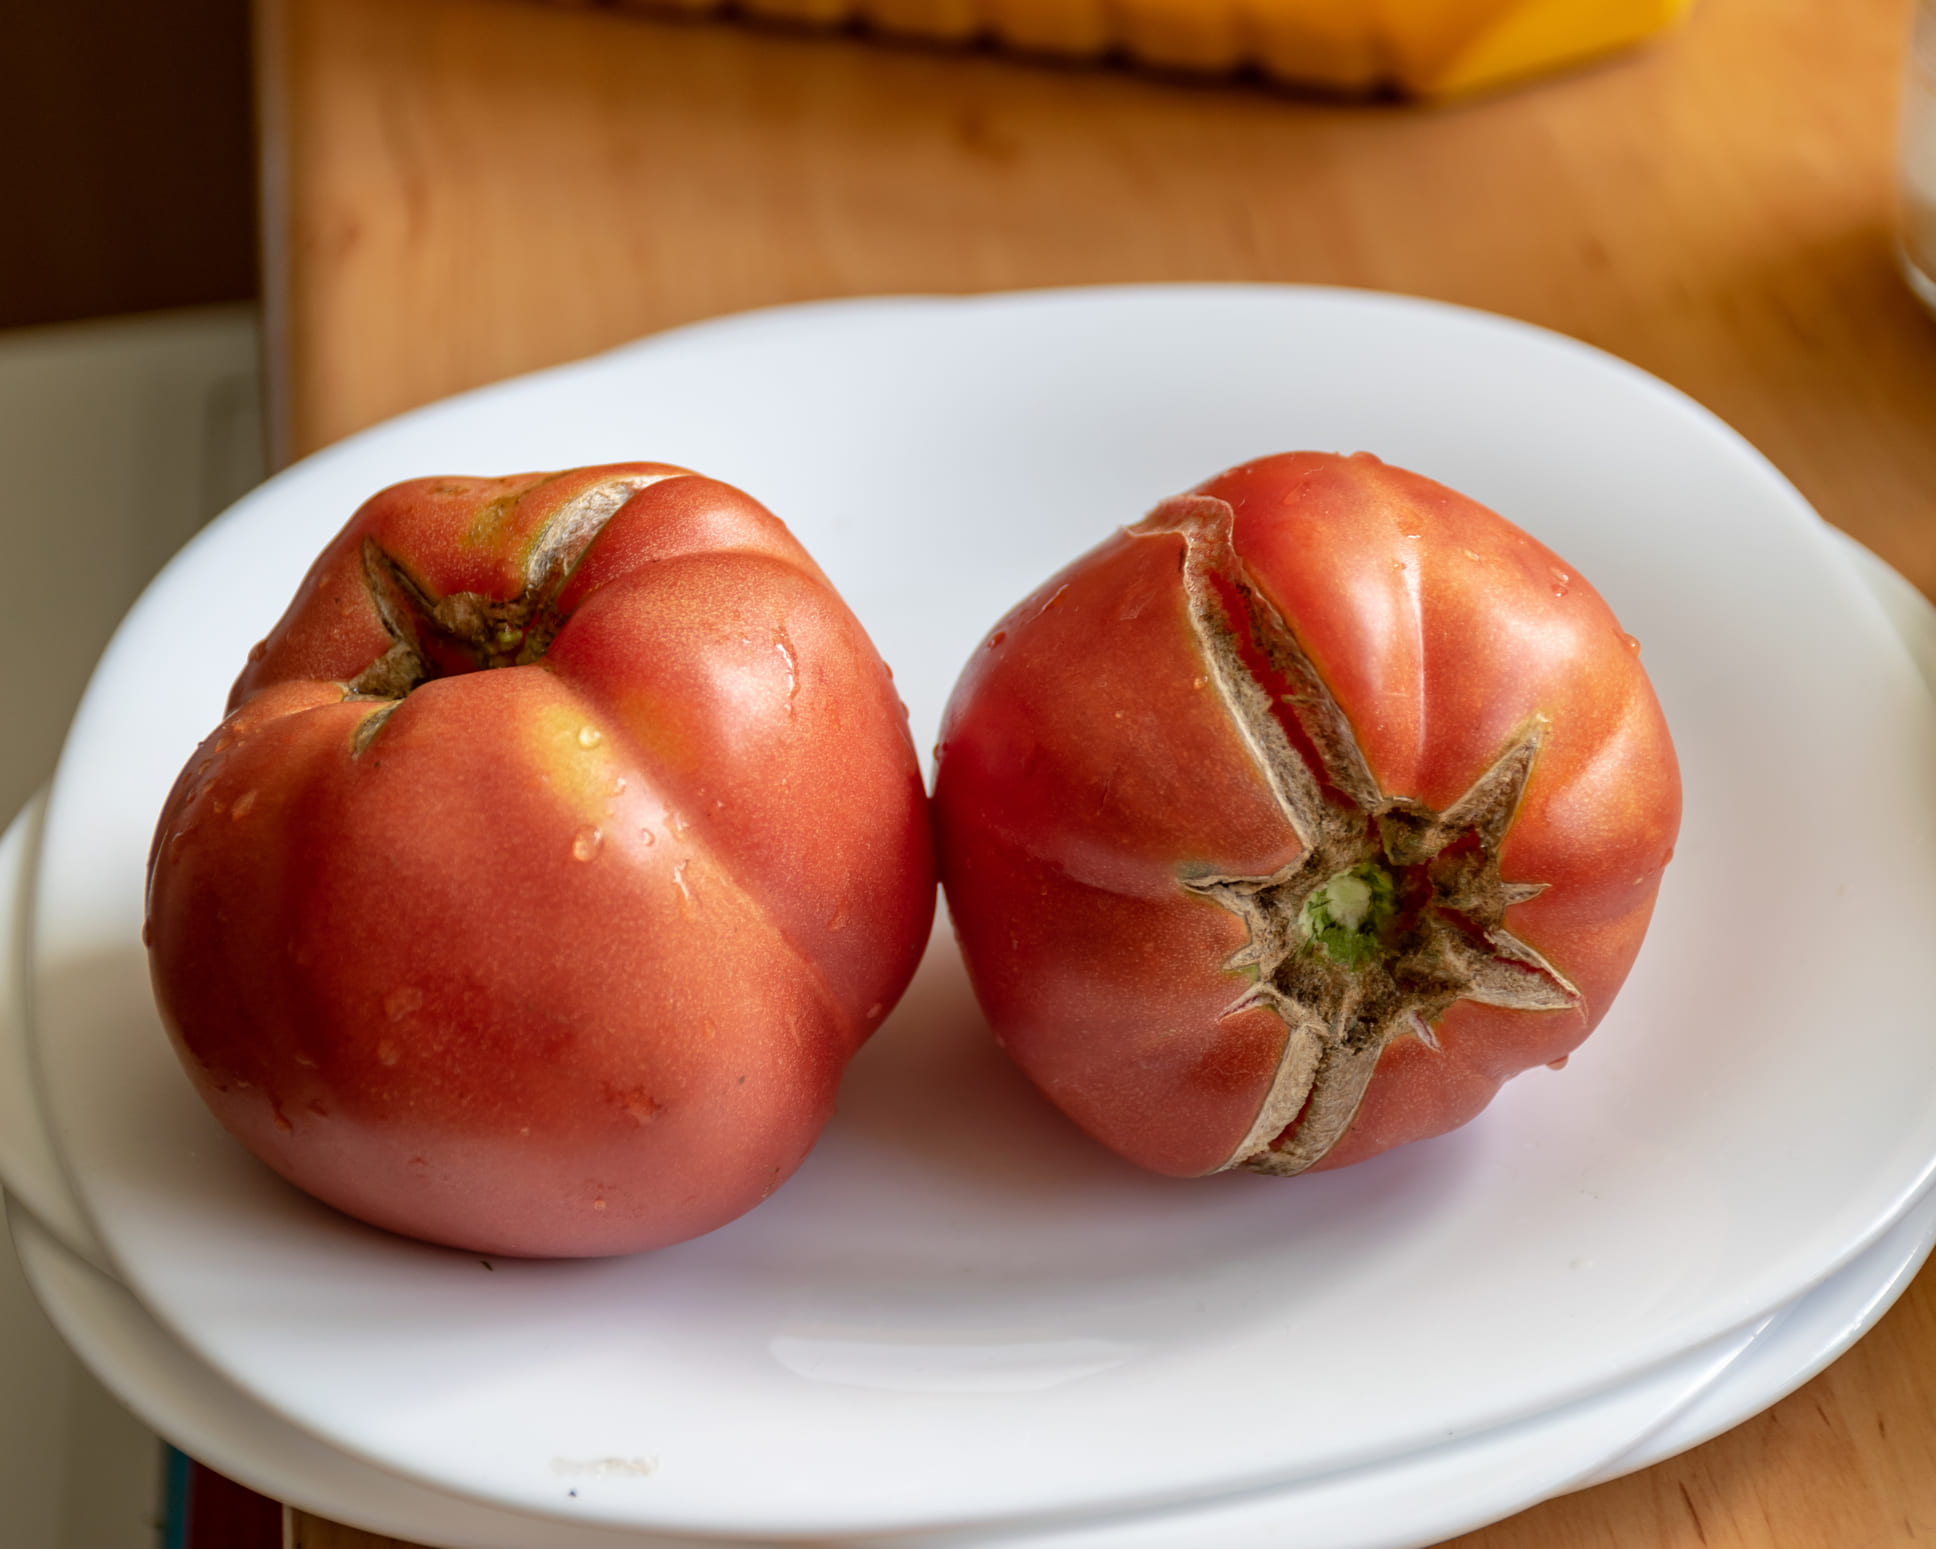
Ensuring constant (somewhat scheduled) watering will avoid your tomato plant experiencing desert dry to flooded soil conditions. The fruit will crack if poor watering occurs because a tomato fruit pulls water in from the rest of the plant to expand and grow. A period without water availability will cause dehydration, and the fruit will suck in as much water as possible with the next watering. More than its skin can take. The stretching will cause the skin to crack; it doesn’t make the fruit uneatable, but it is safer to remove the cracked parts because they might harbour mould.
Often, you might end up with huge plants with lots of leaves and not many tomatoes. Pruning your tomato plant is another crucial step. Areas with a wet summer climate will significantly benefit by pruning. Too many leaves allow for less airflow and more chance for diseases to manifest. Save the plant’s energy for fruit production and not leaves, so pitch off the side shoots carrying leaves called armpits. The fruits grow from flowers and grow on their own stem directly off the main stem, so don’t worry about taking off flowers with pinching off the armpits. You will see the difference.
Give your plant the best possible start by pinching off the first bunch of flowers to save the plant’s energy for root production. Leave the following flowers to produce fruit; a stronger root system supports the plant by then.
Of course, you will need to fertilize for your plant to stay healthy with solid root development to produce delicious fruits.
Bioroot contains essential plant growth regulators along with a combination of trace elements. The concentrated solution of micro-nutrients and seaweed extract stimulates root growth and development when applied to the root zone by fertigation or foliar application. When using Bioroot as a seed dressing, the seedling will emerge with strong early growth.
For faster and overall healthier growth, you should get a hold of Grobest, our liquid fish fertilizer. With the highest nutrient and the lowest carbon footprint, you can easily apply Grobest as a soil drench or a foliar spray. Because Grobest feeds both the plants and microbiome, your tomato plants will have giant, luscious, dark green leaves, produce more blossoms and thus bear more fruit for you to harvest.
Unfortunately, despite all our best efforts, the complete prevention of some common pests and diseases are inevitable. But you would first need to know how to identify the problem to find the best solution. To do that, you can use the following steps:
- Identify the affected part of the plant: The tomato fruit itself, the leaves, stems, flowers, or roots?
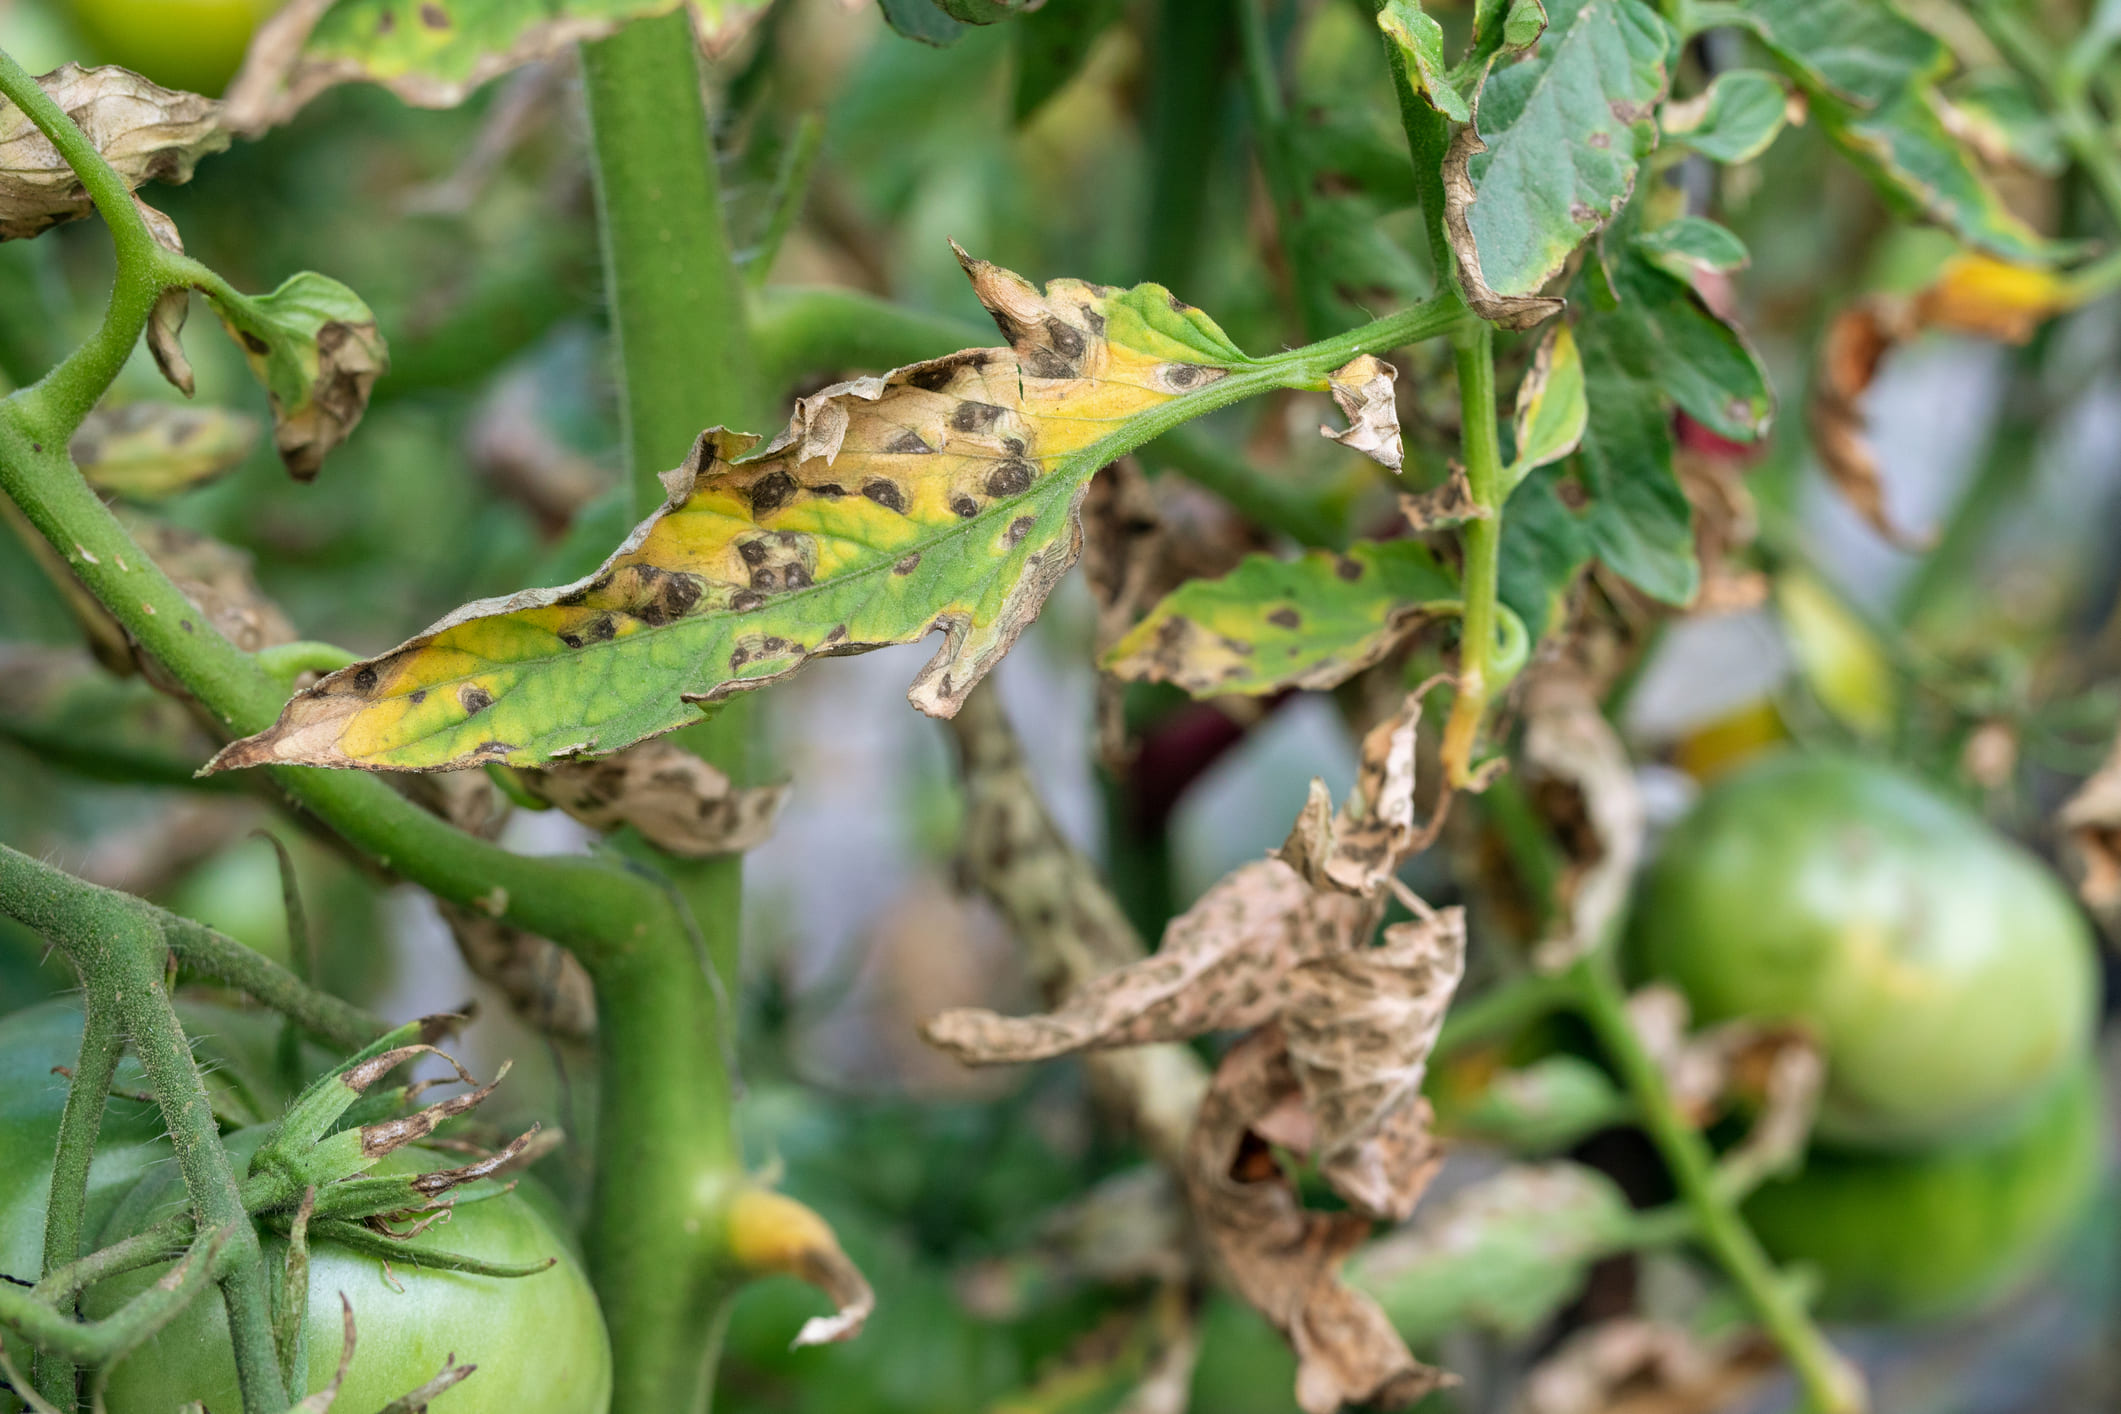
- Note differences: Compare your tomato plant to a healthy plant. How does yours differ? If your plant’s leaves have brown or black patches, holes, chewed edges or fuzzy mould growing on them, you should know something is wrong compared to a healthy tomato plant that has softly fuzzed, medium-green leaves.
- Look for insects: Do you see any insects on your plants? Look thoroughly; some blend in and are pretty hard to find.
For your convenience, we have compiled a list of common pests, diseases and treatment options for tomato plants:
Early Blight (Can be treated with Odeon / Copstar / Orius)
Bacterial spot (Can be treated with Copstar)
Bacterial speck (Can be treated with Copstar)
Botrytis rot (Can be treated with Odeon)
Late Blight (Can be treated with Odeon)
Leaf Roll (Can be treated with Copstar)
Powdery Mildew (Can be treated with Sulfostar)
American/African bollworm (Can be treated with Plant Care / Organicide Plus / Servus)
Aphids (Can be treated with Organicide Plus)
Astylus beetle (Can be treated with Organicide Plus)
Whiteflies (Can be treated with Organicide Plus / Plant Care)
Red Spider Mite (Can be treated with Plant Care / Seizer 100)
Semi-looper (Can be treated with Seizer 100)
Leafminer (Tuber moth larvae) (Can be treated with Seizer 100)
American leafminer (Can be treated with Seizer100)
Rust Mite (Can be treated with Sulfostar)
Visit our product page for more information